

Column Sets are used to both arrange and screen on data. Create Column Sets to build a report of data items, or create them to find new stock ideas using relevant data parameters.
Once a Column Set is created, any changes made to the columns or filters are automatically saved.
To create a Column Set, click the Column Set Menu button at the top of List Manager. Next, click the plus (+) icon in the dropdown menu. A box will appear to name the Column Set.
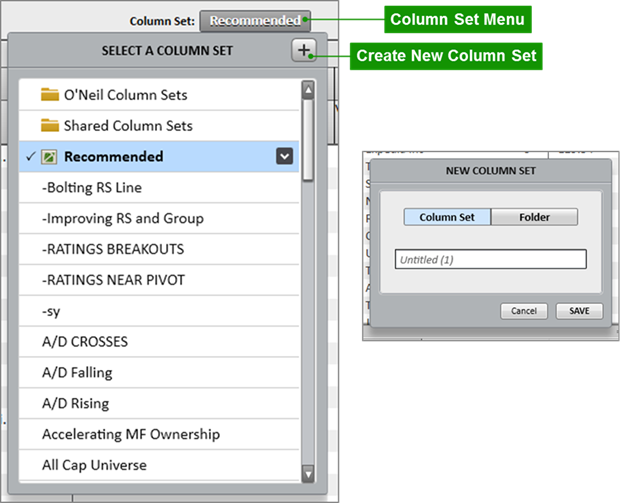
Click the Folder button to create a new folder to organize Column Sets.
Add Columns
Click Add Columns at the top of List Manager to add data metrics to the current column set. Added metrics may be used for screening purposes, report purposes, or both.

The Metric Library
After clicking Add Columns, the Metric Library will appear on the left side of List Manager. The Metric Library contains all possible data metrics that can be added to the Column Set.
Use the headings and subheadings to find relevant metrics, or use the search box to find metrics using keywords.

Metric Descriptions
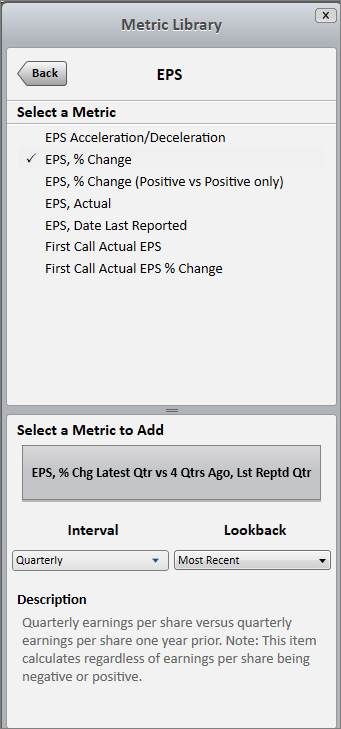
Click on a metric to see selection options and a description at the bottom.
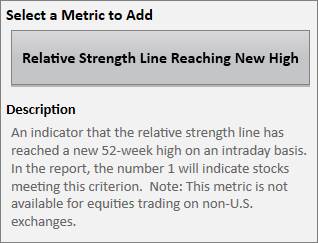
Some descriptions have important information pertaining to filtering metrics and/or global availability:
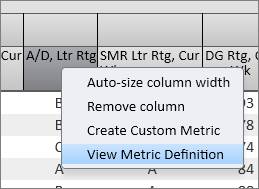
Right click directly on a Column Heading Metric Name and click View Metric Definition to see an explanation of that metric.
Interval and Lookback
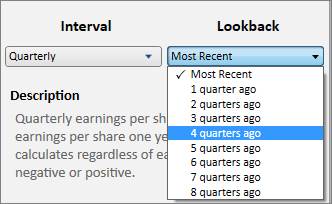
Some metrics have an option to select an interval and/or a lookback. Use the interval dropdown to select the type of data (quarterly, annual, etc.). Use the lookback dropdown to select specific historical data.
Add the Metric
Once the correct metric is selected and the interval and lookback are set, click the large gray box containing the metric name to add it to the current Column Set.

Please note that if the text in the box is grayed out and not clickable, then the metric is already in the current Column Set.
To apply a filter to a column, click the cell above the desired column header.
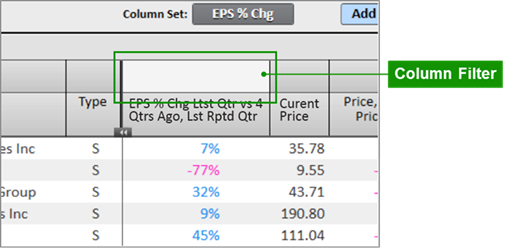
For basic filtering, choose an operator from the dropdown, and then enter a parameter in the blank space. Click Apply.
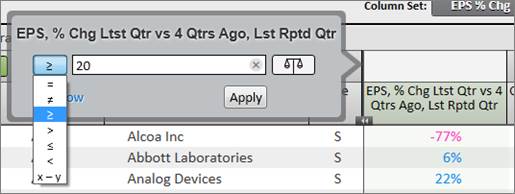
Filters may involve numbers, letters, or words as parameters, depending on the metric data. Use the column data itself, or the metric library description as a guide when deciding how to select the parameter.
The filter will now appear highlighted in green in the cell above the column header to denote that it is turned on.
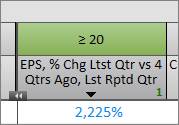
If a cell containing a filter is gray, then the screen and its filters are turned off.
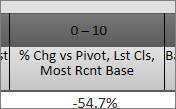
Click OFF next to Screen (X) to switch the screen back to ON:


This will activate the filters and change their respective cells to green.
To create a screen filter based on a metric-to-metric comparison, choose an operator from the dropdown, and then click the scale icon to the right of the input box.

A new Metric Library will appear containing all the possible metrics that can logically be compared.
Although a metric cannot be compared to itself, a metric can be compared to the same metric on a different interval or lookback. For example, the current Relative Strength (RS) Rating may be compared to the RS Rating from 4 weeks ago.
Once the correct metric is selected and the interval and lookback are set, click the large gray box containing the metric name to add it to the comparison criteria. Click Apply.

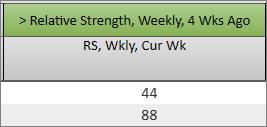
A single data metric can be filtered on more than one parameter. For multi-parameter filtering, open the filter menu and click Add Row.

The filter will now have an additional line to screen on multiple parameters.
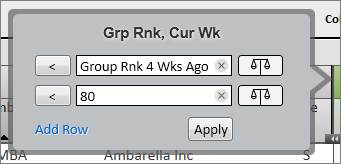
Add up to five different lines of filtering criteria.
When all filters for the metric are set, click Apply. The filter cell will denote the number of criteria for that metric.
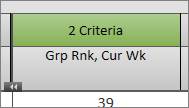
For certain data metrics, the filtering options are tailored to the logical parameters.
For example, when applying a filter to the Industry Group Name metric, there are slightly different options for operators and parameters based on what makes sense for that data:
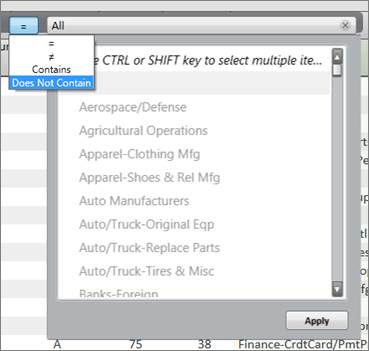
Column Order and Position
Click, hold, and drag a column header left or right to change the order of the columns. When moving a column, blue arrows will appear showing where the column will be added once the cursor click is released.

Fixing Columns
There is a solid vertical line in the list data that separates the columns into two distinct sections. The columns on the left side of the line are fixed so that scrolling to the left or right does not affect their visibility. The columns on the right side are not fixed. Columns on the right may be dragged to the left side of the line to fix important data columns.
Click the small arrows icon near the top of the vertical line to hide all the fixed left-side columns except for the #, Flag, and Symbol columns.
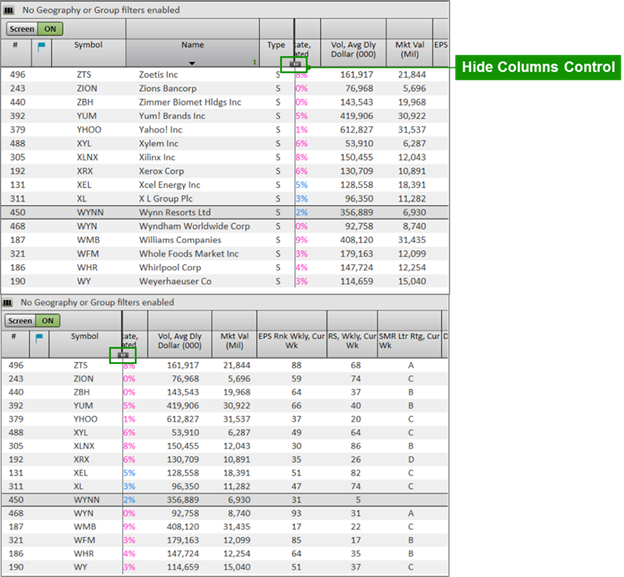
Deleting Columns
To delete a column, right-click on the column header and hit Remove Column. This will delete the column and any filters attached to it from the current Column Set.
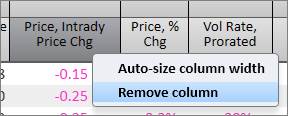
Sizing Columns
To size a column, hover the cursor over the right-side edge of the column header until a white arrow icon appears. Click, hold, and drag the right edge to make the column thinner or wider.
To auto-size a column, right-click on the column header and hit Auto-Size Column Width. This will automatically resize that column to its optimal width.
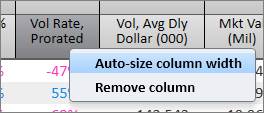
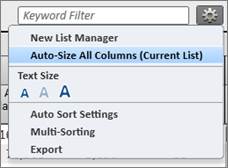
To auto-size all the columns in the current list at one time, click the gear icon in the top right corner of List Manager, and hit Auto-Size All Columns.
Sorting Columns
To sort the items in a list by a column metric, click on the metric’s column header. Click once to sort numbers in descending order, or letters from A to Z, indicated by an upward pointing arrow.

Click the column header once more to sort numbers in ascending order, or letters from Z to A, indicated by a downward pointing arrow.

To perform a secondary sort, hold down the Ctrl key, and click on a different column header. Continue using the Ctrl-click method to sort the data as many times as desired. The small green number in the lower right corner of the column header indicates the sort sequence.
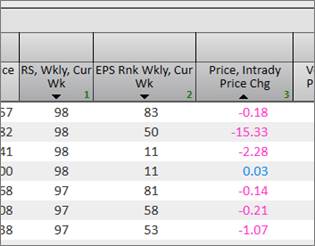
To cancel the multi-sort, click any column header. This column header will now be the primary and only sort.
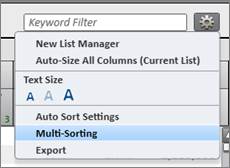
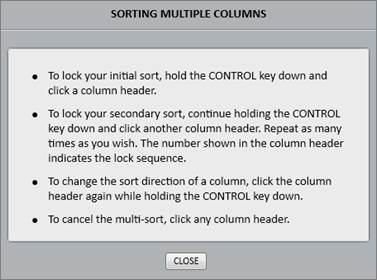
Click the gear icon in the top right corner of List Manager and hit Multi-Sorting for a quick reference guide on multi-sorting lists.
Column Sets can be run over any list or database, whether it is an auto-generated PANARAY List, a user-created My List, a Smart List, a portfolio, or the entire O’Neil Database. Simply select a list or database from the left side of List Manager, and then choose a Column Set from the Column Set Menu dropdown. This will take the chosen list or database and run it through the Column Set report and/or screen.
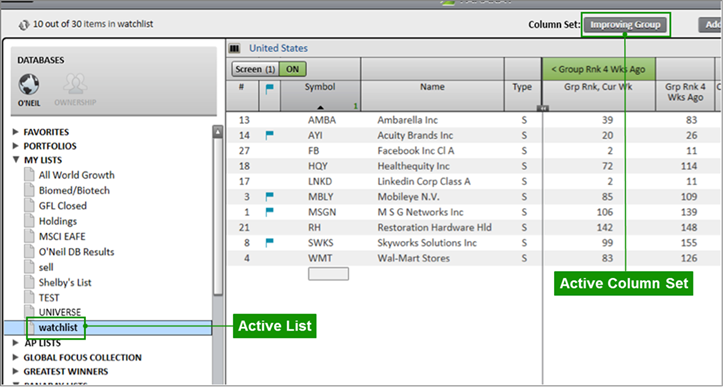
The Column Set name that appears in the button at the top of List Manager is the currently selected Column Set for that list.
Lists default to the Column Set that was last selected for that list.
Screen Report Refresh
The top left corner of the screen displays a report that indicates the number of items that pass through all the active filters (Column Set filters, Geography and Groups filters, Keyword filters), out of the total number of items in the original list.
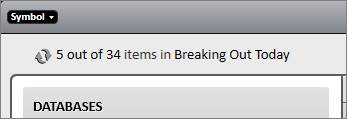
Click the refresh icon to re-run the Column Set filters and refresh the screen.

Screen Summary Report and ON/OFF Button
At the top of List Manager, there is a Screen Summary Report and a button to enable or disable the screen.
When the button is green and reads ON, then the screen is on and the filters are active.

When the button is gray and reads OFF, then the screen is off and the filters are inactive.

Toggle the button between ON and OFF modes to quickly switch the screen on or off.
Click the Screen Summary Report next to the ON/OFF button to see a summarized report of the Column Set metrics and criteria. The number in parentheses indicates how many filters are in the current screen.
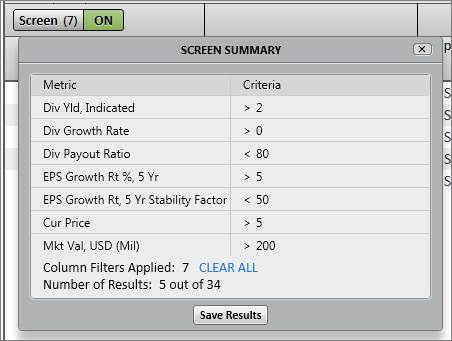
Click Clear All in blue to clear out all the filters from the Column Set.
Click Save
Results to save the screen results to a new My List.
Custom metrics allow users to create their own unique data metrics using formulas based on existing data items found in the Metric Library. Custom metrics can then be added to Column Sets and Screens
To create a custom metric, right click on a Column Header and select Create Custom Metric.
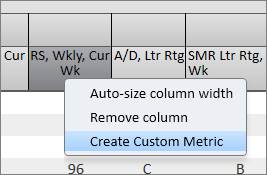
The Custom Metric Menu contains all the tools to create, name, and save a custom metric. A comprehensive guide on how to create Custom Metric Formulas can be found here: Custom Metric Help Guide
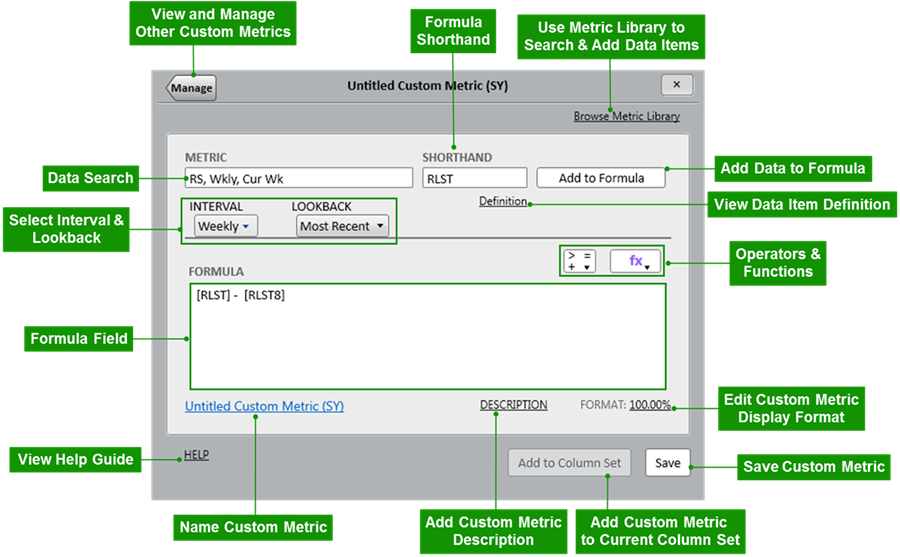
Data Search
Use the data search bar to find items to add to the formula field.
Select Interval & Lookback
Certain data items have options to set an interval and/or a lookback.
Formula Field
Enter the custom metric formula in this section.
View Help Guide
Click the Help button to view a comprehensive Custom Metric Help Guide that outlines the available formula operators and functions, and examples of how to use them.
Name Custom Metric
Click the blue title link to name the custom metric. This is how the metric will appear in the Metric Library.
Add Custom Metric Description
Add a description that will appear in the Metric Library.
Add Custom Metric to Current Column Set
Add the custom metric to the current column set.
Save Custom Metric
Save the custom metric to the Metric Library.
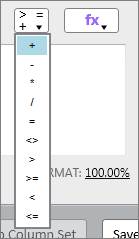
Edit Custom Metric Display Format
Click the format button to edit how the custom metric will appear in the Column Set. Custom metrics may be displayed as a number or text, with various decimal and unit options.
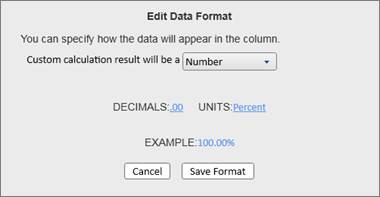
Operators & Functions
Select an operator and/or function to add to the formula field.
View Data Item Definition
Click Definition to view a description of the selected data item. Select or highlight a data metric from the data search section, the formula shorthand section, or the formula field itself to view the corresponding definition below.

Add Data Item to Formula
Click Add to Formula to add the displayed data item or shorthand to the formula field.
Use Metric Library to Search & Add Data Items
Click Browse Metric Library to use the full Metric Library to search for data items.
Formula Shorthand
The formula shorthand section shows how the data item will appear in the formula field. Custom metric formulas require the proper shorthand to be recognized in PANARAY. To find a data item’s shorthand, use the data search bar or browse the Metric Library.
Saved custom metrics will reside in the Metric Library under My Metrics and Custom Metrics.

Click the plus (+) icon to create a new custom metric.
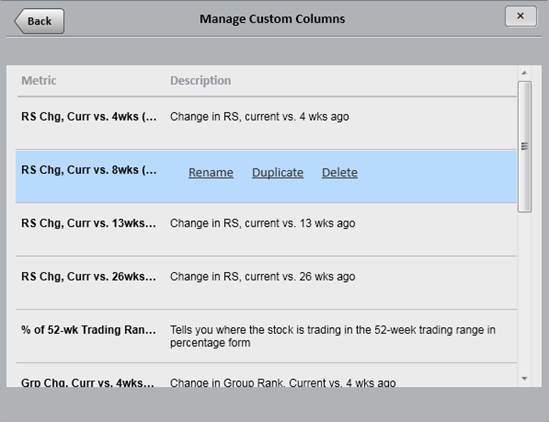
Click Manage to view and manage existing custom metrics.
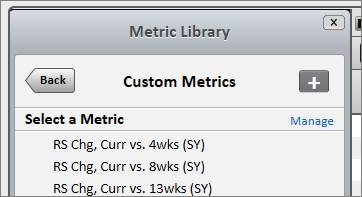
In the Manage Custom Columns menu, hover the cursor over a custom metric to Rename, Duplicate, or Delete that metric. Click the custom metric itself to edit it.
Column Sets are managed through the Column Set Menu at the top of List Manager. Click the Column Set Menu button to access the dropdown.
To manage a Column Set, hover the cursor over the Column Set name until a small box with a white arrow appears.
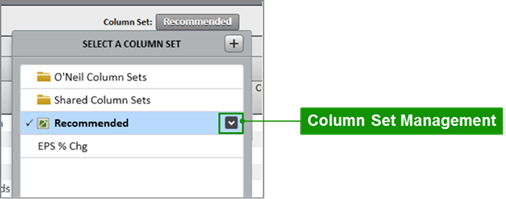
Click the arrow box to see a menu with various options for that Column Set:
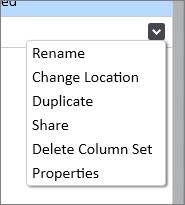
Rename
Click Rename to change the name of a Column Set.
Change Location
Click Change Location to move the Column Set to a new or a different folder.
Duplicate
Click Duplicate to make a copy of a Column Set. Any Column Set, PANARAY preset or otherwise, may be duplicated.
Share
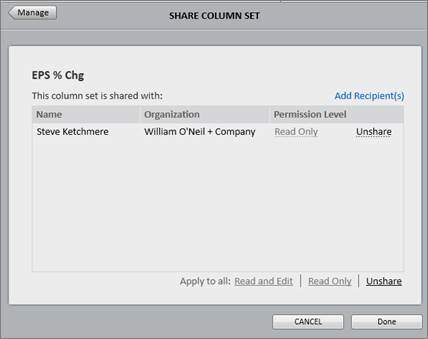
Click Share to share the Column Set to users within the same firm, or to William O’Neil + Co. Client Services. In the Share Column Set menu, click Add Recipient(s) to add a shared user. Under the Permission Level column, choose between Read Only and Read & Edit permissions for each shared person. Please note that if the sharer or the recipient makes any changes to a Read & Edit Column Set, the changes will flow through to all shared users’ Column Sets.
Delete Column Set
Click Delete Column Set to remove the Column Set from the list.
Properties
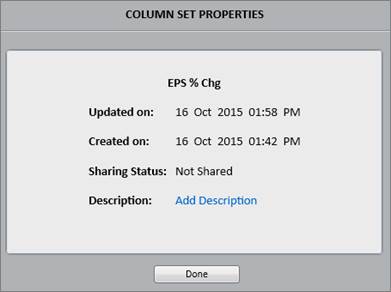
Click Properties to see information on the Column Set including when it was last updated, when it was created, its shared status, and an option to manually add a description.
Through the Column Set Menu, access custom Column Sets, PANARAY Column Sets, Shared Column Sets and various folders. Preset PANARAY Column Sets have a green PANARAY icon next to the name.
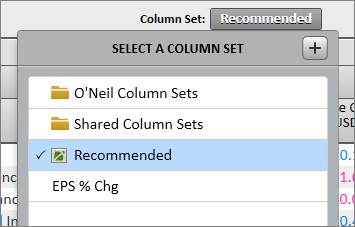
Preset PANARAY Column Sets may be altered as desired. If any changes have been made to a preset Column Set, it will read in the dropdown as (Modified).

To return a preset Column Set to its original form, hover the cursor over the Column Set name until a small box with a white arrow appears. Click the box, and then select Reset from the dropdown menu.

Select Duplicate to make a copy of the altered Column Set.
The Recommended Column Set is a default set of columns tailored to the list being viewed. For each type of list, the Recommended Column Set shows optimized column metrics based on the composition or selection criteria of a list.
The O’Neil Column Sets folder contains preset Column Sets based on various investment criteria.
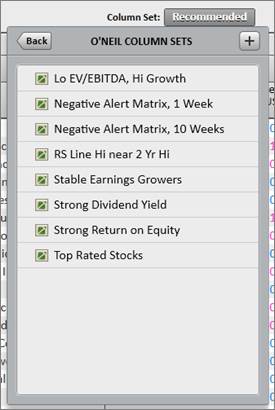
The Negative Alert Matrix uses 11 criteria to signal when a stock makes significant violations that may be a warning of waning strength. Choose between the 1-Week and the 10-Week Negative Alert Matrix in the O’Neil Column Sets folder to run a list through the violation report.
The Negative Alert Matrix updates after the close on Friday with the new metrics from that week.
This folder contains any Column Sets that have been shared to the user.
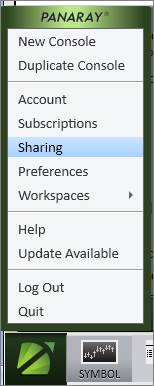
Shared items can be managed through the PANARAY Menu in the lower left corner on of the screen.
 .
.